Page 5 of 11
Re: RT rebuild thread
Posted: Mon Jan 16, 2012 5:07 pm
by MattD
Nice planning work... its going to be good

Re: RT rebuild thread
Posted: Mon Jan 16, 2012 6:42 pm
by DH2
MattD wrote:Nice planning work... its going to be good

I hope so! Long way to go yet though.
I'm onto measuring and making some datums for the current positioning now - and working out which bits of chassis I need to move, as I have to widen the tunnel a bit to accomodate the Type9 properly.
Re: RT rebuild thread
Posted: Mon Jan 23, 2012 2:16 pm
by DH2
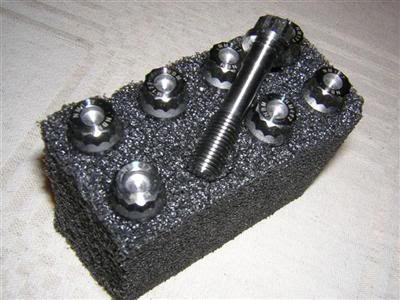
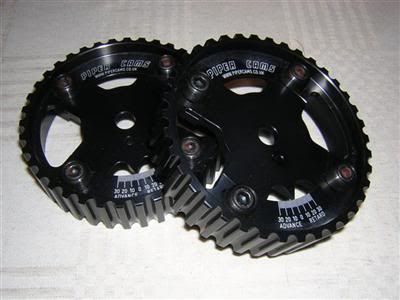
Before I get back to grubby stuff, here's some shiny parts I picked up - heavy duty rod bolts will provide some peace of mind when playing with the rev limiter, and vernier pulleys to allow accurate timing of the non-standard cams I'll be fitting.
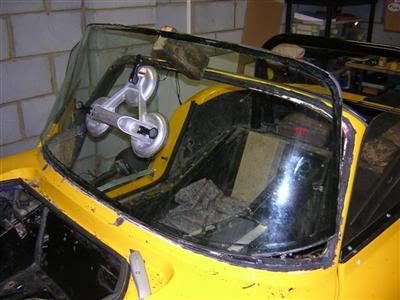
After some measuring and marking, I pulled the engine back out and put it to one side. I've decided I am going to get on with removing the main body tub, so set about removing the windscreen as the first step on that route. Tedious job, and I managed to crack it, so I guess I'll just have to get that new heated screen after all... Does everyone elses screen not fit the aperture very well at the bottom corners?
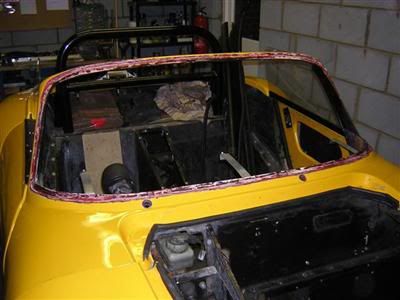
There are quite alot of rivets to be removed to get the tub off, and I figured I'd start at the front. Before doing so, I removed the outer pedal box which sealed up the gaps between engine bay and passenger compartment, and was affixed to the front firewall.
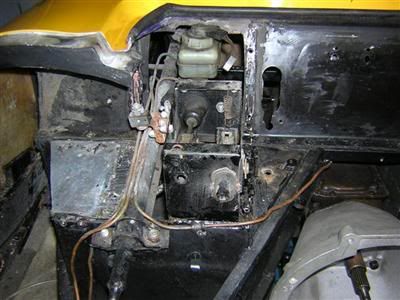
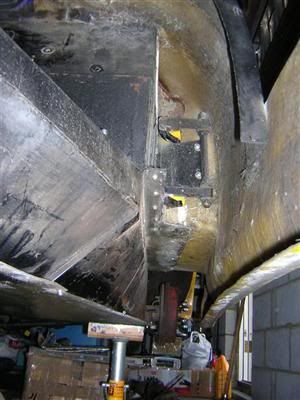
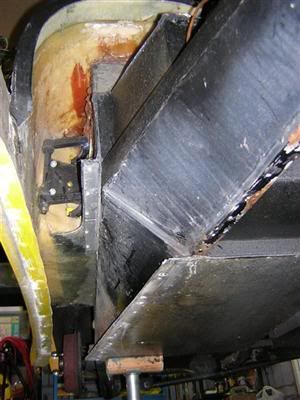
I soon got scuppered by access to the rivets around the front of the tub, I need to get a right-angle adapter to gain drill access. So I faced up to the less pleasant task of drilling out about 80 rivets on my back under the car, to get the side panels off between the chassis and the bottom edges down the sides of the bodywork.
DH2
Re: RT rebuild thread
Posted: Mon Jan 23, 2012 2:34 pm
by stylussprinter
Isn't it just Soooooo much fun though

In each corner of the bonnet shut gulley there should be a bolt/nut going through into the inner tub top , after that it's a cutting infill f/glass job on the dash inside etc .
Re: RT rebuild thread
Posted: Mon Jan 23, 2012 3:31 pm
by DH2
stylussprinter wrote:Isn't it just Soooooo much fun though

I didn't think so at the time, though it beats sitting at a desk all day, maybe I should take a few months off to get it done.
stylussprinter wrote:In each corner of the bonnet shut gulley there should be a bolt/nut going through into the inner tub top , after that it's a cutting infill f/glass job on the dash inside etc .
Haven't looked closely but no bolt heads showing in the gutter. But I'm hoping I can get the inner and outer body off the chassis in one piece - it seems feasible at the moment.
Re: RT rebuild thread
Posted: Mon Jan 23, 2012 3:48 pm
by stylussprinter
I'm not sure that's possible . When I built mine , the inner went on but then it took three people carefully stretching the bendy body shell to loop it over the rear then the front -- quite tricky not to break anything. If it stays all in the one peice I'm not sure you'll get it over the front dashboard/bulkhead metalwork

Worth a try though

You'll need a few spare hands when you're ready though

Re: RT rebuild thread
Posted: Mon Jan 23, 2012 3:53 pm
by DH2
stylussprinter wrote:I'm not sure that's possible . When I built mine , the inner went on but then it took three people carefully stretching the bendy body shell to loop it over the rear then the front -- quite tricky not to break anything. If it stays all in the one peice I'm not sure you'll get it over the front dashboard/bulkhead metalwork

Worth a try though

You'll need a few spare hands when you're ready though

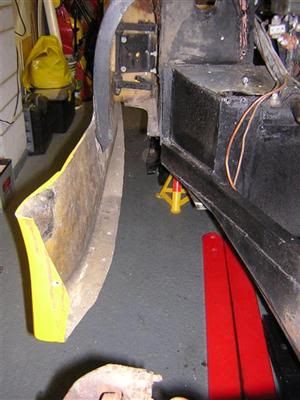
But it is an RT with the front chopped off, so it should just lift straight off

There's a fair bit of clearance between body and chassis at the front...
Re: RT rebuild thread
Posted: Mon Jan 23, 2012 4:24 pm
by stylussprinter
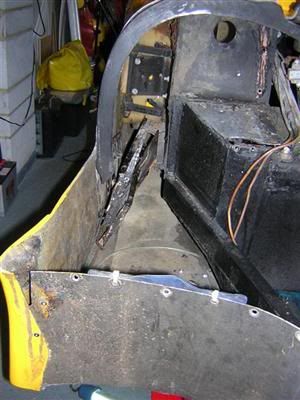
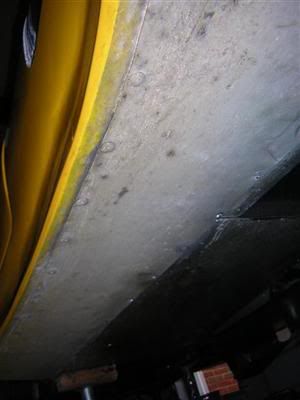
Looks as though you've cut off the under wing body section that rivets onto the alluminium ledge , conected to the front chassis lower rail

Re: RT rebuild thread
Posted: Mon Jan 23, 2012 4:51 pm
by DH2
stylussprinter wrote:Looks as though you've cut off the under wing body section that rivets onto the alluminium ledge , conected to the front chassis lower rail

I have removed the aluminium panels that join the bottom of the bodywork to the floor, if that's what you mean?
Re: RT rebuild thread
Posted: Mon Jan 23, 2012 8:17 pm
by stylussprinter
Ah , I see . The original bodywork had f/glass right across that area so he obviously chopped it about a bit or one of the three owners did

Re: RT rebuild thread
Posted: Mon Jan 23, 2012 9:55 pm
by kevp
To remove the rivets cant you use a sharpish cold chisel or old chisel and beat them off rather than drilling.
The windscreens are not a good fit, which is why the big transit rubber is used to cover the edges up. My screen had to be cut to fit.
Re: RT rebuild thread
Posted: Mon Jan 23, 2012 10:15 pm
by DH2
stylussprinter wrote:Ah , I see . The original bodywork had f/glass right across that area so he obviously chopped it about a bit or one of the three owners did

You mean the classic, or RT bodywork had it? There are remnants of the classic body where it curved under and met the chassis, and was cut off for the RT conversion.
kevp wrote:To remove the rivets cant you use a sharpish cold chisel or old chisel and beat them off rather than drilling.
The windscreens are not a good fit, which is why the big transit rubber is used to cover the edges up. My screen had to be cut to fit.
Yeah I may be able to abuse them off, but I want to minimise damage to the inner tub, and I'm sure I'll need to do some awkward drilling at some other point anyway, so... excuse for a new tool! May well end up having to chisel or grind some of the least accessible ones anyway.
Thanks for the info about the screen - the glass is wider than the frame by about 10mm at each bottom corner.
DH2
Re: RT rebuild thread
Posted: Fri Jan 27, 2012 9:24 pm
by pigeondave
I just bought a heated screen from here
http://www.heatedwindscreens.com/acatal ... reens.html
I thought that the price was quite good, as I had another quote for a non heated screen for £180.
Don't know if you have a different supplier.
Dave
Re: RT rebuild thread
Posted: Sat Jan 28, 2012 1:38 am
by DH2
pigeondave wrote:Don't know if you have a different supplier.
Nope, that's the supplier I had in mind. Any issues at all? I emailed Ricky about the wiring, to check it is a single element, whilst I am drawing a wiring diagram for my new loom.
Dave
Re: RT rebuild thread
Posted: Sat Jan 28, 2012 1:58 pm
by hearbear
DH2 wrote:pigeondave wrote:Don't know if you have a different supplier.
Nope, that's the supplier I had in mind. Any issues at all? I emailed Ricky about the wiring, to check it is a single element, whilst I am drawing a wiring diagram for my new loom.
Dave
Thats the screen I got it has twin elements one on each half of the screen but he recommends joining the two half's together in series.
I will collect the carpets myself as coming to work in London for the week and that will pass an evening.
Cheers George


You'll need a few spare hands when you're ready though


