RT rebuild thread
-
DH2
- Posts: 232
- Joined: Wed Jan 30, 2008 2:09 pm
- Are you a Stylus owner?: yes
- Location: Suffolk
- Contact:
Re: RT rebuild thread
I can't decide whether it is a good or bad thing, but I'm keeping a spreadsheet of everything I spend on this car.
It's a bit scary so far what has been spent when I have barely driven the car, and it has sat in storage for almost a whole year...
I just have to keep reminding myself that it is better than having to buy everything all in one go, and most of the things I have bought have been at decent prices compared to having to buy new.
Besides, what else would I spend my money on - no pockets in a shroud, as my mother would say!
Daev
-
stylussprinter
- Stylus owner
- Posts: 3772
- Joined: Fri Mar 10, 2006 8:49 pm
- Are you a Stylus owner?: yes
- Location: ASTON CLINTON BUCKS
Re: RT rebuild thread
It's always best to know the truth even if you don't spread it around --- helps decision making  Also depends what the Stylus cost you in the first place (ie. pre-owned buy) as to whether your spending is out of proportion
Mine cost £16,000 to build as new from the kit , granted that it was a very high spec ' Since then it's had many upgrades and development changes plus damage repairs , amounting to a further £24,000 (Over 12 years of course)
  A scary thought in total but knowing helps , when you have the odd day considering further development or NOT


There are days when totting these figures up make me wonder what car I could have bought for that money Then I remember the fact that I didn't have £40,000 in one go nor is there much that could match it for performance/handling
Mine cost £16,000 to build as new from the kit , granted that it was a very high spec '
There are days when totting these figures up make me wonder what car I could have bought for that money
I just love the Stylus but she keeps swallowing £££ !
Alfa Red 159 2.4 jtdm ti 260bhp 365lbft / BilsteinB12 + Adjustable Powerflex camber/castor bushes. Red STYLUS 2lt zetec 231bhp 185lbft Dunnell . RED 1972 Alfa 2lt GTAm replica 170bhp.
Alfa Red 159 2.4 jtdm ti 260bhp 365lbft / BilsteinB12 + Adjustable Powerflex camber/castor bushes. Red STYLUS 2lt zetec 231bhp 185lbft Dunnell . RED 1972 Alfa 2lt GTAm replica 170bhp.
Re: RT rebuild thread
Do you know if this will work with a toyota engine bolted to a type9 box? The clutch mechanism etc we have is a little to be desired and tbh there is very little room to get the arm out of the side and get a cable in there, but enough for a couple of hoses!DH2 wrote:I got it on an individual listing on eBay. I paid £130 for it. It was originally supplied by Burtons I believe.Pete&Matt wrote:where did you get your hydraulic clutch slave from? Very expensive?
There is a commercial listing I've seen which is selling the same item, I suspect a little cheaper than the Burtons price... clickety-click here.
I figured it would be the best option as I want to get the engine as far back as possible in the chassis - mainly so that I can get rid of the bonnet bulge and return to the original clean bonnet line.
Any further progress with your car since it got painted?
Dave
Cheers
Matt
-
stylussprinter
- Stylus owner
- Posts: 3772
- Joined: Fri Mar 10, 2006 8:49 pm
- Are you a Stylus owner?: yes
- Location: ASTON CLINTON BUCKS
Re: RT rebuild thread
This particular kit is for a type 9 fitting regardless of engine type . To fit it , you simply need to calculate the distance between the end of the hydraulic piston and the clutch fingers , hence the need of the ally spacer which comes in various thicknesses --- you then skim the chosen spacer to suit but allow 4mm's from spacer to fingers . One other really important thing is to fit a stop under the clutch pedal so you don't pedal the spacer off the tube end 
I just love the Stylus but she keeps swallowing £££ !
Alfa Red 159 2.4 jtdm ti 260bhp 365lbft / BilsteinB12 + Adjustable Powerflex camber/castor bushes. Red STYLUS 2lt zetec 231bhp 185lbft Dunnell . RED 1972 Alfa 2lt GTAm replica 170bhp.
Alfa Red 159 2.4 jtdm ti 260bhp 365lbft / BilsteinB12 + Adjustable Powerflex camber/castor bushes. Red STYLUS 2lt zetec 231bhp 185lbft Dunnell . RED 1972 Alfa 2lt GTAm replica 170bhp.
-
DH2
- Posts: 232
- Joined: Wed Jan 30, 2008 2:09 pm
- Are you a Stylus owner?: yes
- Location: Suffolk
- Contact:
Re: RT rebuild thread
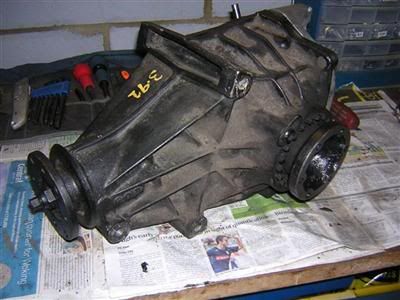
A diff.
I already have a 3.6 LSD, but I was looking at the gearing calculations and whilst it gave a nice high speed cruise on paper, in reality I think it is a bit too long-legged. So I bought a 3.9 open diff (from Simon), which I will use to create a hybrid 3.9 LSD. The 3.6 needs a rebuild anyway as the bearings are a bit wobbly, so I'll make one good one out of the two.
In other news, the MG should be off for an MOT in the next week-ish, so hopefully work will be commencing on the Stylus before too much longer*.
DH2
* = famous last words no doubt, I said the same thing about 6 months ago! The MG needed more work than I originally anticipated.
I already have a 3.6 LSD, but I was looking at the gearing calculations and whilst it gave a nice high speed cruise on paper, in reality I think it is a bit too long-legged. So I bought a 3.9 open diff (from Simon), which I will use to create a hybrid 3.9 LSD. The 3.6 needs a rebuild anyway as the bearings are a bit wobbly, so I'll make one good one out of the two.

In other news, the MG should be off for an MOT in the next week-ish, so hopefully work will be commencing on the Stylus before too much longer*.
DH2
* = famous last words no doubt, I said the same thing about 6 months ago! The MG needed more work than I originally anticipated.
Last edited by DH2 on Thu Nov 24, 2011 7:21 pm, edited 1 time in total.
-
DH2
- Posts: 232
- Joined: Wed Jan 30, 2008 2:09 pm
- Are you a Stylus owner?: yes
- Location: Suffolk
- Contact:
Re: RT rebuild thread
I started a little bit of minor fettling on the car a week or so back!
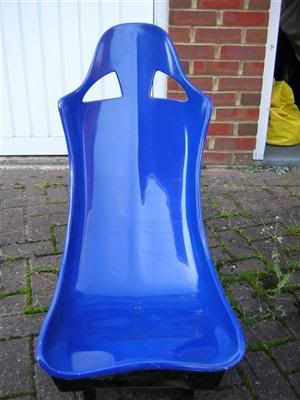
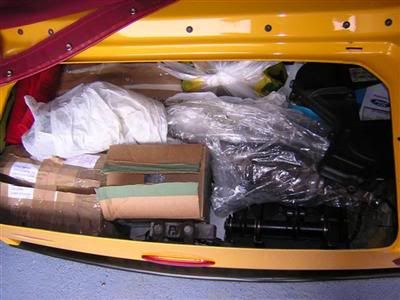
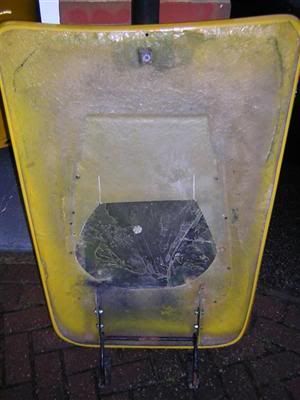
I decided I needed to make more storage space in the car, so removed the passenger seat and belts... anyone want to buy a pair of GRP seats and Sabelt 4-point harnesses? Actually the seats aren't bad, they are double-skinned so nice and rigid, but still surprisingly light.
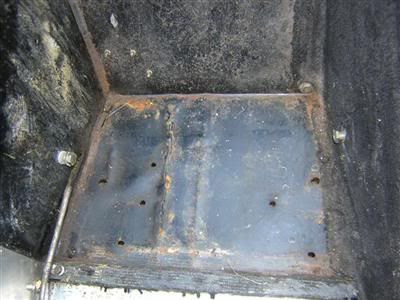
Seat pan has seen a bit of action...
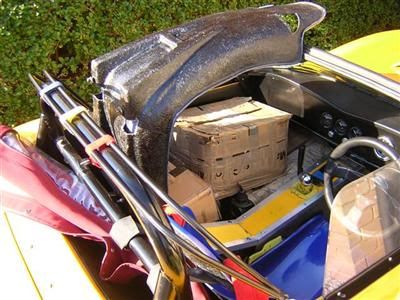
This made lifting the heavy items (i.e. gearbox) into and out of the car a bit easier! I packed it back up to the rafters - really running out of space now...
DH2
I decided I needed to make more storage space in the car, so removed the passenger seat and belts... anyone want to buy a pair of GRP seats and Sabelt 4-point harnesses? Actually the seats aren't bad, they are double-skinned so nice and rigid, but still surprisingly light.

Seat pan has seen a bit of action...

This made lifting the heavy items (i.e. gearbox) into and out of the car a bit easier! I packed it back up to the rafters - really running out of space now...


DH2
Last edited by DH2 on Thu Nov 24, 2011 7:22 pm, edited 1 time in total.
-
stylussprinter
- Stylus owner
- Posts: 3772
- Joined: Fri Mar 10, 2006 8:49 pm
- Are you a Stylus owner?: yes
- Location: ASTON CLINTON BUCKS
Re: RT rebuild thread
Seats interest me or at least one seat but depends what cost ? PM me with details and seat fixing method . Mine have threaded inserts underneath .DH2 wrote:I started a little bit of minor fettling on the car a week or so back!
I decided I needed to make more storage space in the car, so removed the passenger seat and belts... anyone want to buy a pair of GRP seats and Sabelt 4-point harnesses? Actually the seats aren't bad, they are double-skinned so nice and rigid, but still surprisingly light.
Seat pan has seen a bit of action...
This made lifting the heavy items (i.e. gearbox) into and out of the car a bit easier! I packed it back up to the rafters - really running out of space now...
DH2
I just love the Stylus but she keeps swallowing £££ !
Alfa Red 159 2.4 jtdm ti 260bhp 365lbft / BilsteinB12 + Adjustable Powerflex camber/castor bushes. Red STYLUS 2lt zetec 231bhp 185lbft Dunnell . RED 1972 Alfa 2lt GTAm replica 170bhp.
Alfa Red 159 2.4 jtdm ti 260bhp 365lbft / BilsteinB12 + Adjustable Powerflex camber/castor bushes. Red STYLUS 2lt zetec 231bhp 185lbft Dunnell . RED 1972 Alfa 2lt GTAm replica 170bhp.
- MattD
- Stylus owner
- Posts: 693
- Joined: Wed Mar 01, 2006 11:48 am
- Are you a Stylus owner?: yes
- Location: Liphook, Hampshire, UK
Re: RT rebuild thread
I could be interested in the other seat...... 
SSC Stylus Integrale Turbo16V
Kit 1999, OTR 2002, and still tweaking....
Kit 1999, OTR 2002, and still tweaking....
-
DH2
- Posts: 232
- Joined: Wed Jan 30, 2008 2:09 pm
- Are you a Stylus owner?: yes
- Location: Suffolk
- Contact:
Re: RT rebuild thread
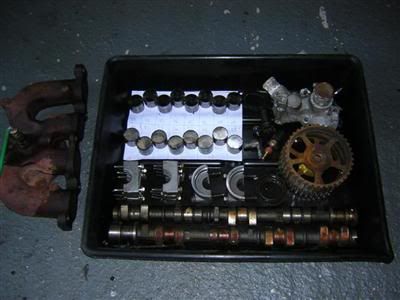
I bought another head from a well known web-based auction site, for the grand price of 99p (plus a decent lump of postage). It will make a handy doorstop, cos when it turned up, it wasn't much use for alot else. Hopefully I can salvage some valves out of it, so I can make one good head out of the two I have.
Advertised as "good condition" and "full working order" - check out the state of the cams, yes that's rust - half of the cam caps are incorrect and not from this head (so head itself is therefore scrap) - valves have rust damage on the inside - pulleys are a bit rough - a few buckets have pitting.
Oh well, you take your chances I suppose... glad I didn't pay more for it!
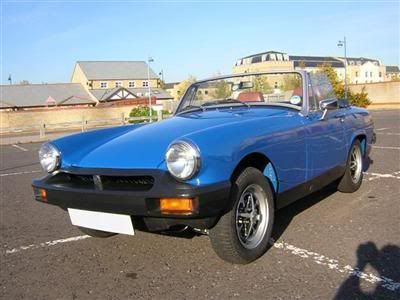
In other news, the MG is now "finished", and is road-legal. So I expect to move the Stylus in in a couple of weeks and try to fix the VX engine that is in it, before pulling that out and selling it on. I've got my tame suspension designer on the case of thinking about what I need to measure so he can start CAD'ing up the Stylus.
DH2
Advertised as "good condition" and "full working order" - check out the state of the cams, yes that's rust - half of the cam caps are incorrect and not from this head (so head itself is therefore scrap) - valves have rust damage on the inside - pulleys are a bit rough - a few buckets have pitting.
Oh well, you take your chances I suppose... glad I didn't pay more for it!

In other news, the MG is now "finished", and is road-legal. So I expect to move the Stylus in in a couple of weeks and try to fix the VX engine that is in it, before pulling that out and selling it on. I've got my tame suspension designer on the case of thinking about what I need to measure so he can start CAD'ing up the Stylus.

DH2
Last edited by DH2 on Thu Nov 24, 2011 7:23 pm, edited 1 time in total.
-
DH2
- Posts: 232
- Joined: Wed Jan 30, 2008 2:09 pm
- Are you a Stylus owner?: yes
- Location: Suffolk
- Contact:
Re: RT rebuild thread
So, I got the cars swapped over, and the rebuild on the Stylus can now officially commence proper.
First job was to weigh the car. 625kgs (not sure how much fuel is in the tank yet). This gives me the starting figure, and it will be interesting to see where I end up. Whilst I'll be taking a load of weight out of the engine, I'll be adding some in other areas, so we'll see. I'll be recording the weight of parts coming off and going on the car also.
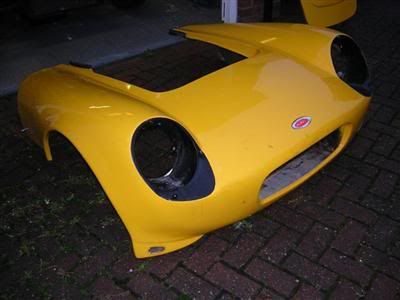
Then I spent some time removing the front bodywork, including stripping out all the lights and crappy hacked bowls and wiring. I intend to remove the bonnet bulge/scoop, and join the two pieces together to make a proper one piece front end - but that's a job for much later.
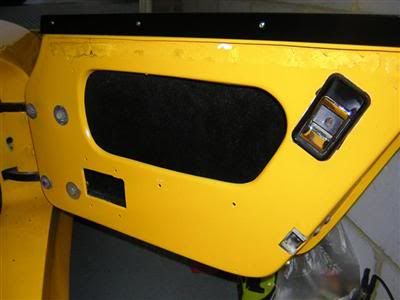
Did some stripping of random-ish bits from the car, door cards (so I could get at the), wing mirrors, drivers seat and harness, roof bars... Removing the door cards revealed a wealth of holes in the inner skin which will need to be sorted out.
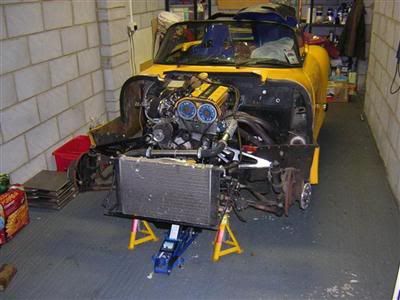
Got the car up in the air, mainly so that I can sell the wheels and tyres - I've been given a set of old Ford alloys which I can use to push the car around on if needed, but they can be stored outside so as not to take up precious garage space.
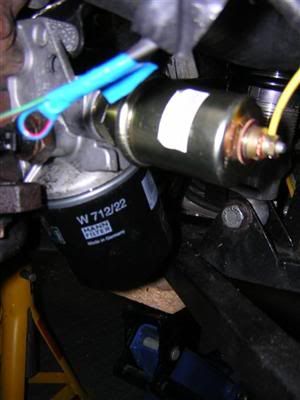
Bought an adapter so that I could fit a pressure sender to the oil pump, to check out the oil pressure on the engine. Initial testing shows it is pretty much as I would expect - 20psi idle and 60-odd psi at revs on a cold engine. It was a bit late to run the engine for long, so a warm engine test will have to happen later.
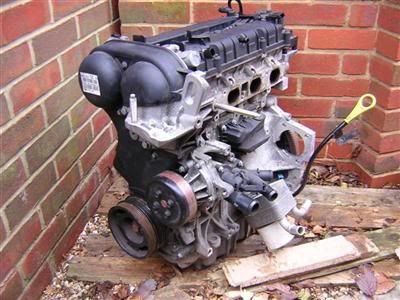
Stripped all the extraneous bits off my donor engine - PAS pump, air-con compressor, inlet manifold, throttle body, alternator, plumbing, clutch...
More soon...
DH2
First job was to weigh the car. 625kgs (not sure how much fuel is in the tank yet). This gives me the starting figure, and it will be interesting to see where I end up. Whilst I'll be taking a load of weight out of the engine, I'll be adding some in other areas, so we'll see. I'll be recording the weight of parts coming off and going on the car also.
Then I spent some time removing the front bodywork, including stripping out all the lights and crappy hacked bowls and wiring. I intend to remove the bonnet bulge/scoop, and join the two pieces together to make a proper one piece front end - but that's a job for much later.


Did some stripping of random-ish bits from the car, door cards (so I could get at the), wing mirrors, drivers seat and harness, roof bars... Removing the door cards revealed a wealth of holes in the inner skin which will need to be sorted out.

Got the car up in the air, mainly so that I can sell the wheels and tyres - I've been given a set of old Ford alloys which I can use to push the car around on if needed, but they can be stored outside so as not to take up precious garage space.

Bought an adapter so that I could fit a pressure sender to the oil pump, to check out the oil pressure on the engine. Initial testing shows it is pretty much as I would expect - 20psi idle and 60-odd psi at revs on a cold engine. It was a bit late to run the engine for long, so a warm engine test will have to happen later.

Stripped all the extraneous bits off my donor engine - PAS pump, air-con compressor, inlet manifold, throttle body, alternator, plumbing, clutch...

More soon...
DH2
-
DH2
- Posts: 232
- Joined: Wed Jan 30, 2008 2:09 pm
- Are you a Stylus owner?: yes
- Location: Suffolk
- Contact:
Re: RT rebuild thread
On a bit of a whim, I removed the rear lights from the bodywork, which were bonded in with plenty of goop.
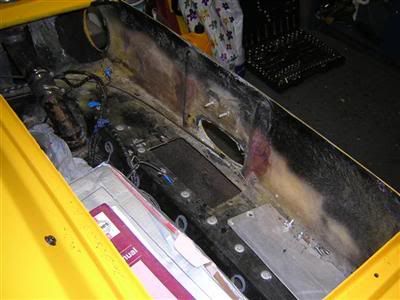
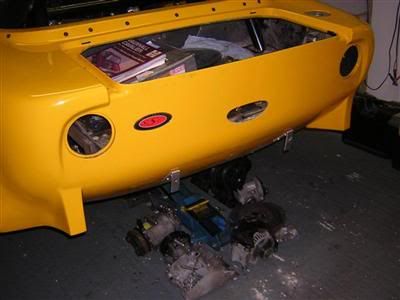
Then finally decided that the engine is coming out, so started preparing for that. Firstly removed the battery, then drained the fuel tank, and whilst that was happening also drained the coolant. Then removed all the cooling system plumbing, and disconnected all the wiring between car and engine. This just left the the exhaust, engine and gearbox mounts to do.
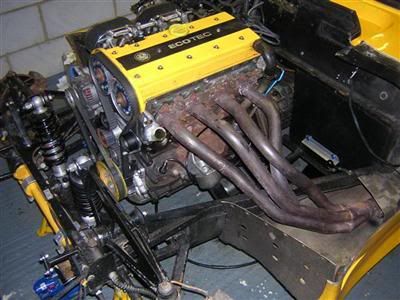
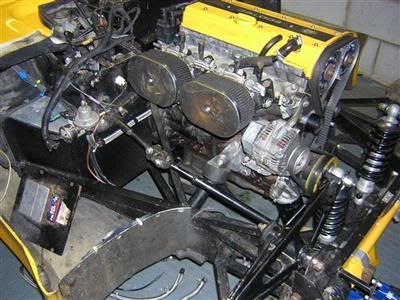
One evening this week I thought I'd have a go at the exhaust, which put up surprisingly little of a fight...
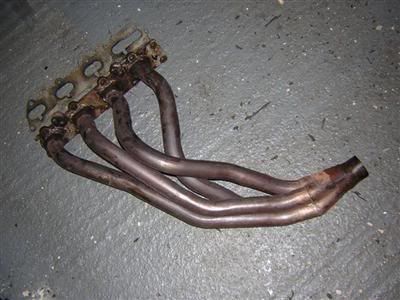
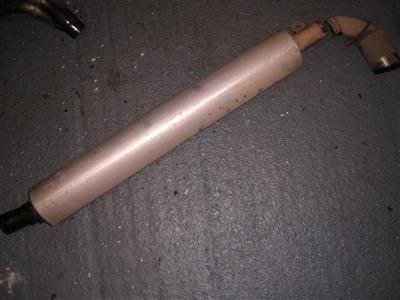
The engine and gearbox will be hoiked out at the weekend.


Then finally decided that the engine is coming out, so started preparing for that. Firstly removed the battery, then drained the fuel tank, and whilst that was happening also drained the coolant. Then removed all the cooling system plumbing, and disconnected all the wiring between car and engine. This just left the the exhaust, engine and gearbox mounts to do.


One evening this week I thought I'd have a go at the exhaust, which put up surprisingly little of a fight...


The engine and gearbox will be hoiked out at the weekend.
-
DH2
- Posts: 232
- Joined: Wed Jan 30, 2008 2:09 pm
- Are you a Stylus owner?: yes
- Location: Suffolk
- Contact:
Re: RT rebuild thread
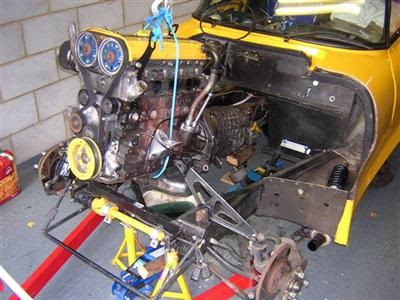
Last weekend I pulled the engine out, and the ECU and engine loom. They have been turned into cash and gone to a new home already!
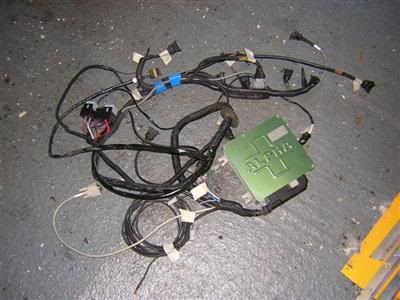
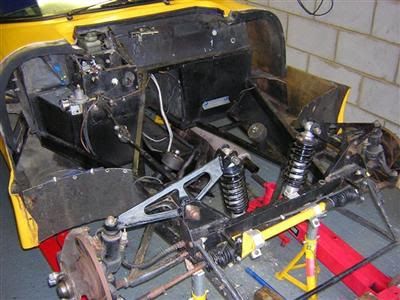
DH2


DH2
-
DH2
- Posts: 232
- Joined: Wed Jan 30, 2008 2:09 pm
- Are you a Stylus owner?: yes
- Location: Suffolk
- Contact:
Re: RT rebuild thread
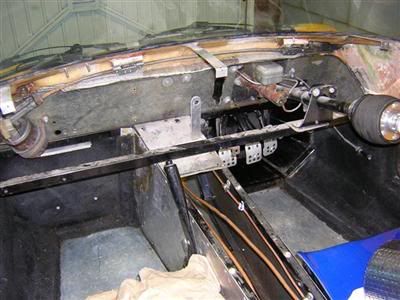
After having removed the engine loom and ECU, I figured I might as well carry on and remove the rest of the loom - much easier with the dash out of the way.
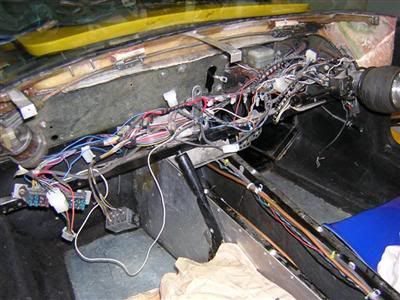
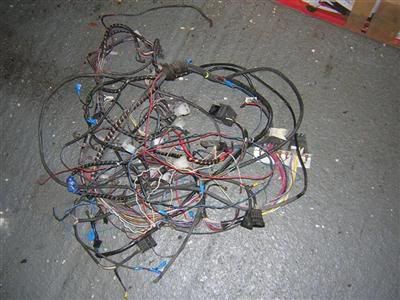
Resulting in a wirey deposit on the garage floor.
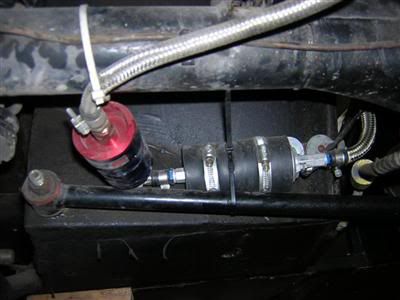
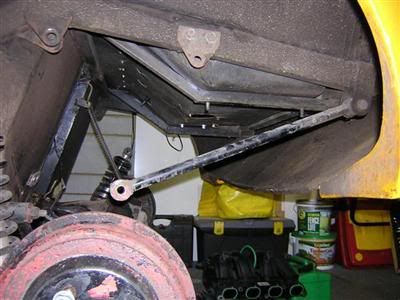
Then went on to removing the remainder of the fuel system, pump, filter, flexibles, tank. Ended up having to part dismantle the rear suspension to make enough space to get the tank out from under the bodywork. Rear brake hoses are designed to be axle straps aren't they?
DH2

Resulting in a wirey deposit on the garage floor.


Then went on to removing the remainder of the fuel system, pump, filter, flexibles, tank. Ended up having to part dismantle the rear suspension to make enough space to get the tank out from under the bodywork. Rear brake hoses are designed to be axle straps aren't they?


DH2
-
DH2
- Posts: 232
- Joined: Wed Jan 30, 2008 2:09 pm
- Are you a Stylus owner?: yes
- Location: Suffolk
- Contact:
Re: RT rebuild thread
There's been a small gap in proceedings, where I've been busy with other things, but hopefully back onto it a bit more now.
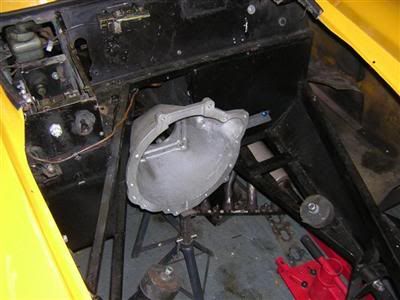
Got hold of a bellhousing to connect the SE to the Type 9. It doesn't fit very far down the tunnel, which may cause bonnet interference issues at the front of the engine, but we'll have to see. I intend to dangle the engine into the hole sometime soon to get a feel for it. But the gear lever position may dictate how far back I can go, which could save a load of tunnel chassis chopping.
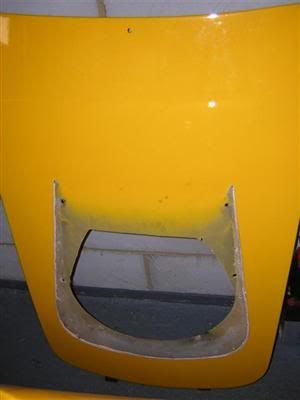
Removed the bulge/scoop from the bonnet. I hope this is not wishful thinking that I'll be able to fit the engine under the standard bonnet profile... There's a bit of work to do here to the bonnet to fill that massive hole in nicely, as well as getting it bonded into the front bodywork.
Moved on to pulling the remaining carpets out - the tunnel and floor ones were already absent, leaving just the ones down the sides and the rear bulkhead, which were probably there to hide the horrors that lie beneath.
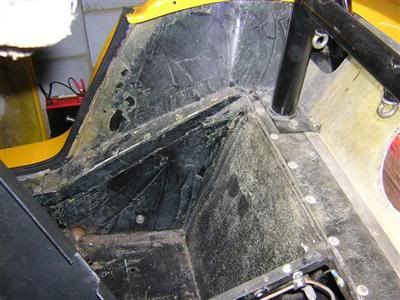
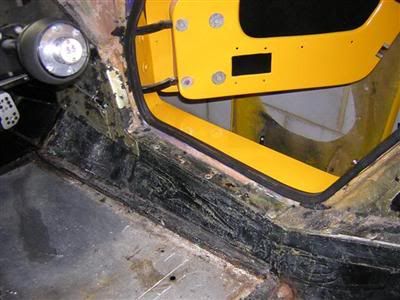
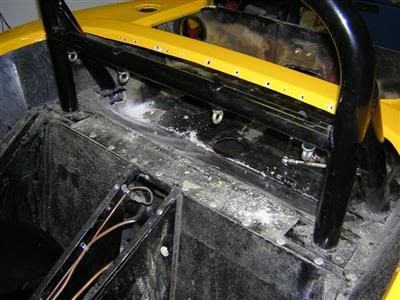
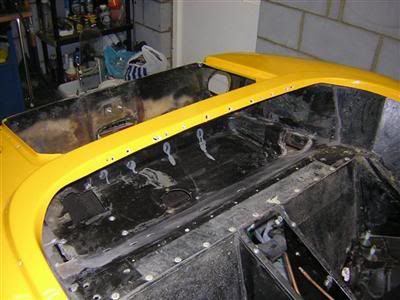
I'm planning on getting the car off for a rollcage in the near future - probably best to get this done now before I remove the bodywork, as it needs to fit inside it, and then hopefully all chassis mods can be done in one hit - so I worked on removing the rear panel between cockpit and boot, which was somewhat of a bodgination, and then out came the roll bar itself.
Dave
Got hold of a bellhousing to connect the SE to the Type 9. It doesn't fit very far down the tunnel, which may cause bonnet interference issues at the front of the engine, but we'll have to see. I intend to dangle the engine into the hole sometime soon to get a feel for it. But the gear lever position may dictate how far back I can go, which could save a load of tunnel chassis chopping.

Removed the bulge/scoop from the bonnet. I hope this is not wishful thinking that I'll be able to fit the engine under the standard bonnet profile... There's a bit of work to do here to the bonnet to fill that massive hole in nicely, as well as getting it bonded into the front bodywork.

Moved on to pulling the remaining carpets out - the tunnel and floor ones were already absent, leaving just the ones down the sides and the rear bulkhead, which were probably there to hide the horrors that lie beneath.


I'm planning on getting the car off for a rollcage in the near future - probably best to get this done now before I remove the bodywork, as it needs to fit inside it, and then hopefully all chassis mods can be done in one hit - so I worked on removing the rear panel between cockpit and boot, which was somewhat of a bodgination, and then out came the roll bar itself.


Dave
-
DH2
- Posts: 232
- Joined: Wed Jan 30, 2008 2:09 pm
- Are you a Stylus owner?: yes
- Location: Suffolk
- Contact:
Re: RT rebuild thread
Onwards, despite it being a bit chilly, it was time to have the first trial fit of the new engine.
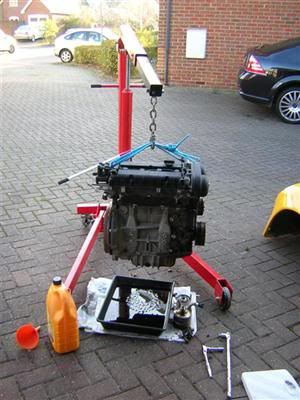
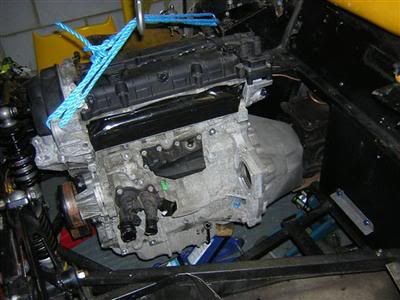
Whilst I left the oil to (slowly) drain out of it, I poked the new gearbox down the tunnel as far I could. After weighing the engine (75kgs with heavy standard flywheel), I then attached the bellhousing to the engine and dropped it into the bay, and fiddled with and stared at it for a while.
Next day, I decided to do a better job of it, so pulled it out again. I started by working out more accurately where I want the gear lever, and was able to move the gearbox back by 2 inches. Then attached the bellhousing to the box.
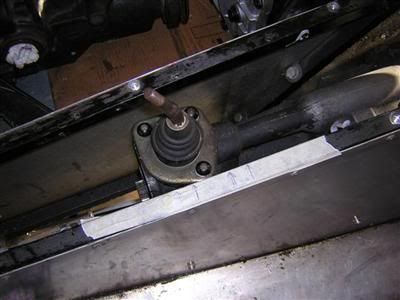
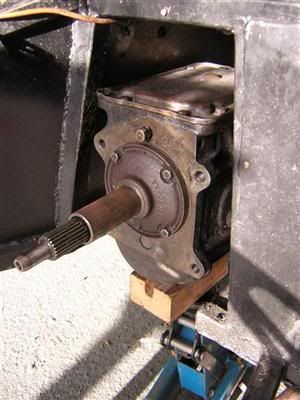
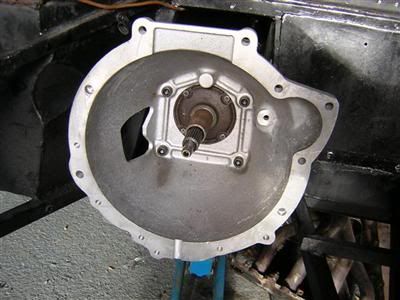
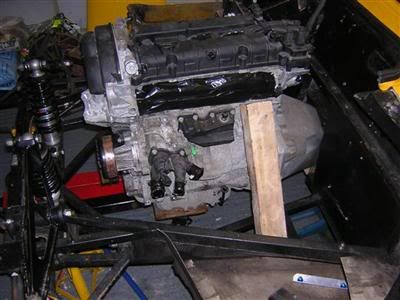
Then dropped the engine back in and bolted it to the bellhousing, braced it with some lumps of wood against the chassis, and removed the hoist. Didn't need much shuffling around at this point - have to say, it looks just about right. The only issue is that the tunnel isn't wide enough for the gearbox, so it's at a slight angle, but it's close enough for now.
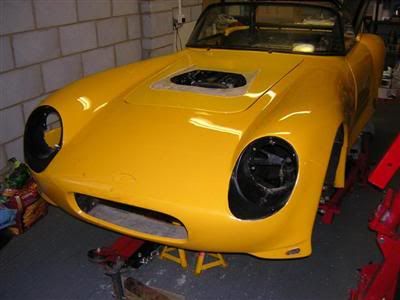
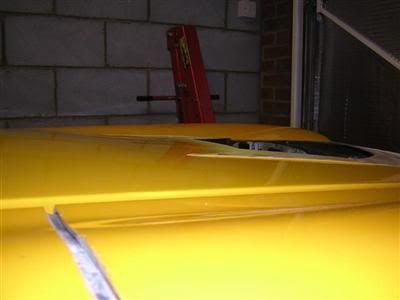
Re-attached the front frame and hinge and bodywork, and then the bonnet. To my surprise, it just about clears, though it is hard to tell for sure due to the abuse to the bonnet, but it's definitely workable at that point. Looking at the underside of the bonnet, it is ok at the back once the lifting eye is removed.
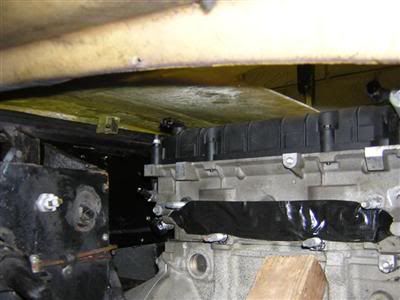
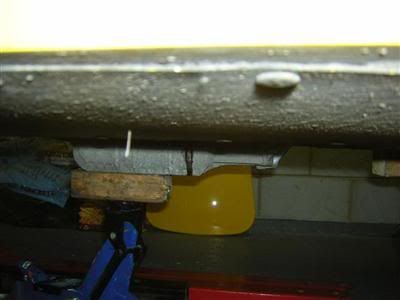
Ground clearance is probably ok, but a little less than I would like, with the sump sticking out around 2 inches. I think I can see how I can do a 1inch sump chop without too much hassle, so will do that.
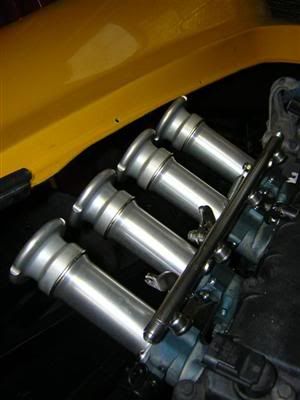
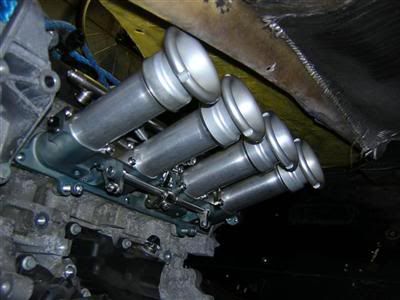
My next area of concern was whether the inlet would clash with the underside of the bonnet, due to the shape. So I dug the TBs out of storage and quickly fitted them up. It is certainly close, but they do fit, especially once I have removed all the of the returns from the body and bonnet. An air filter is not going to be straight forward, but I can work around that hopefully.
Dave
Whilst I left the oil to (slowly) drain out of it, I poked the new gearbox down the tunnel as far I could. After weighing the engine (75kgs with heavy standard flywheel), I then attached the bellhousing to the engine and dropped it into the bay, and fiddled with and stared at it for a while.


Next day, I decided to do a better job of it, so pulled it out again. I started by working out more accurately where I want the gear lever, and was able to move the gearbox back by 2 inches. Then attached the bellhousing to the box.


Then dropped the engine back in and bolted it to the bellhousing, braced it with some lumps of wood against the chassis, and removed the hoist. Didn't need much shuffling around at this point - have to say, it looks just about right. The only issue is that the tunnel isn't wide enough for the gearbox, so it's at a slight angle, but it's close enough for now.

Re-attached the front frame and hinge and bodywork, and then the bonnet. To my surprise, it just about clears, though it is hard to tell for sure due to the abuse to the bonnet, but it's definitely workable at that point. Looking at the underside of the bonnet, it is ok at the back once the lifting eye is removed.


Ground clearance is probably ok, but a little less than I would like, with the sump sticking out around 2 inches. I think I can see how I can do a 1inch sump chop without too much hassle, so will do that.

My next area of concern was whether the inlet would clash with the underside of the bonnet, due to the shape. So I dug the TBs out of storage and quickly fitted them up. It is certainly close, but they do fit, especially once I have removed all the of the returns from the body and bonnet. An air filter is not going to be straight forward, but I can work around that hopefully.


Dave


